Sunday, March 24, 2013

Starting Seeds revisited

In years past, I have started my seeds using those peat pellet kits you get at most home stores.  You know the ones that come with a tray and a clear plastic dome to simulate a green house?  They always start out nicely, however once they start, I never quite know what to do next.  Do I leave the dome on?  Where should I put them?  Should I transplant them into bigger pots?  What I have done in the past is leave the dome on longer than should be, and then once I take it off, just set it in front of a sunny window in my bed room.  However, each year, my plants look sickly and small.  So there I am in the spring, transplanting my sickly tomato plants in my tilled and ready to go beds, while next door, my neighbor has these healthy, bushy tomato plants purchased at a garden store.  What am I doing wrong?  Needless to say, the poor start that my seeds get, translate into late season fruits and a mediocre crop.

This season, I am trying something different.  I was listening to a local garden radio show called "You Bet Your Garden"  and they were talking about tips for starting seeds indoors.  To sum up, window light, although may seem good enough, really isn't enough light for the young seedlings.  So in order to deal with that, it is recommended to use fluorescent bulbs for light.  Keep the light about 2" away from the plants and keep the light on them 24 hrs a day 7 days a week.  You can read about it here.

I can adjust the distance of the bulbs to the plants with the chain.

So, what we did this year, is Mike made for me two shelves worth of fluorescent bulbs.  I have 4 - 3 foot fluorescent bulbs on each shelf.  He connected the lamps with pieces of sheet metal and then I can raise and lower the lights with a chain he attached to the sheet metal.  This is great, as the plants grow I can adjust the distance of the lights.  I keep the lights about 1"-2" away from the plants and I have the lights on constantly.  They seem to be responding well to this set up.

Makeshift lights does the job - 2 bulbs attached together with sheet metal
So, based on a projected last frost date of April 21 (however I suspect this will be later this season with how cold it's been), I worked backwards with my plan of when to start different seeds.  I started in the beginning of  February with onion, broccoli, broccoli raab, celery and parsley seeds.  Each week planting different seeds such as, pepper, radicchio, lettuce, swiss chard, tomato, kale, napa cabbage and brussel sprouts.  Out of all of the seeds I started, all but pepper, tomato and lettuce are repeats for me.  So needless to say, this will be an interesting learning year with all these new vegetable varieties.

Hoping that these tomatoes will look better than last year.

Radicchio - always tasty in a salad.

Onions - this is the first time I'm growing from seed.  I usually start with sets.

Peppers and celery

Broccoli and celery

and more celery - I will have celery this year!

Rather than using peet pellets, I planted my seeds in those 6 pack trays and using potting soil.  The potting soil needs to be saturated, similar to the peat pellets.  I filled my trays with soil, then wet the soil a bit, planted the seeds and water some more.  By doing it this way, the seeds won't float to the top as the soil is already a bit moist.

I will continue to share my experience on how this is all going.  So far I'm pleased.  Warmer weather can't get here soon enough.

Monday, February 18, 2013

Back to Eden


I have been inspired this year by a video that I saw called "Back to Eden" which you can watch here on Vimeo.

God is the great orchestrator of all on earth.  And when we (people) try to take over, we mess things up.  What I have gotten out of this video is that if we just pause for a moment and take a look around, we can see all of the answers to our questions by looking at God's amazing creation.

So, what does that mean for gardening?  Well...if you look out in nature, you can see that God gives us all we need to grow crops, and grow crops well.  It's when we try to over-engineer things that we make more work for ourselves.  Tilling, weeding, pest control to name a few.

Additionally, over the years, we have become more accustomed to all things prepared, refined and boxed.  Our taste buds know little anymore of whole, raw, organic, fresh food.  We find something like a donut to be called a sweet treat, when an apple is what a sweet treat means.  Sweet doesn't have to be bad for you,  God didn't make it that way.  He gave us taste buds to enjoy food.  Indulge yourselves without guilt with a bushel of fresh strawberries, for example.  Satisfy your crunchy craving on fresh baby spinach and baby carrots.  Nibble on sprouted lentils   It's all there for the taking.

So, what does this mean for me this growing season?  Well, I am going to be adopting the principles from Paul Gautschi by focusing on a ground covering for my garden.  I've been using raised beds for years and have been pleased with the success from them.  Beds that are not walked on and I am constantly enriching with compost.  I started falling back onto my old habits of tilling, which is really contradictory to God's plan.  Tilling is really more harm than good.  It breaks up all the good soil and worms that are busy keeping my raised beds soft and fluffy.  That plus, without fail, a week after I till, I am out there weeding.  One other issue I have throughout the season is watering.  What a chore it is to make sure each day that my garden is watered.  And if I miss a few days, the crops are stressed.

So my plan this year is to get a good covering on my garden which will keep weeds down, and the earth below constantly moist.  According to Paul, and also Ruth Stout with a covering, one does not have to worry about watering.  The covering keeps just the right amount of moisture in the garden during periods of drought as well as rains.  The covering continues to break down providing the nutrients that are needed to keep the soil enriched and soft.

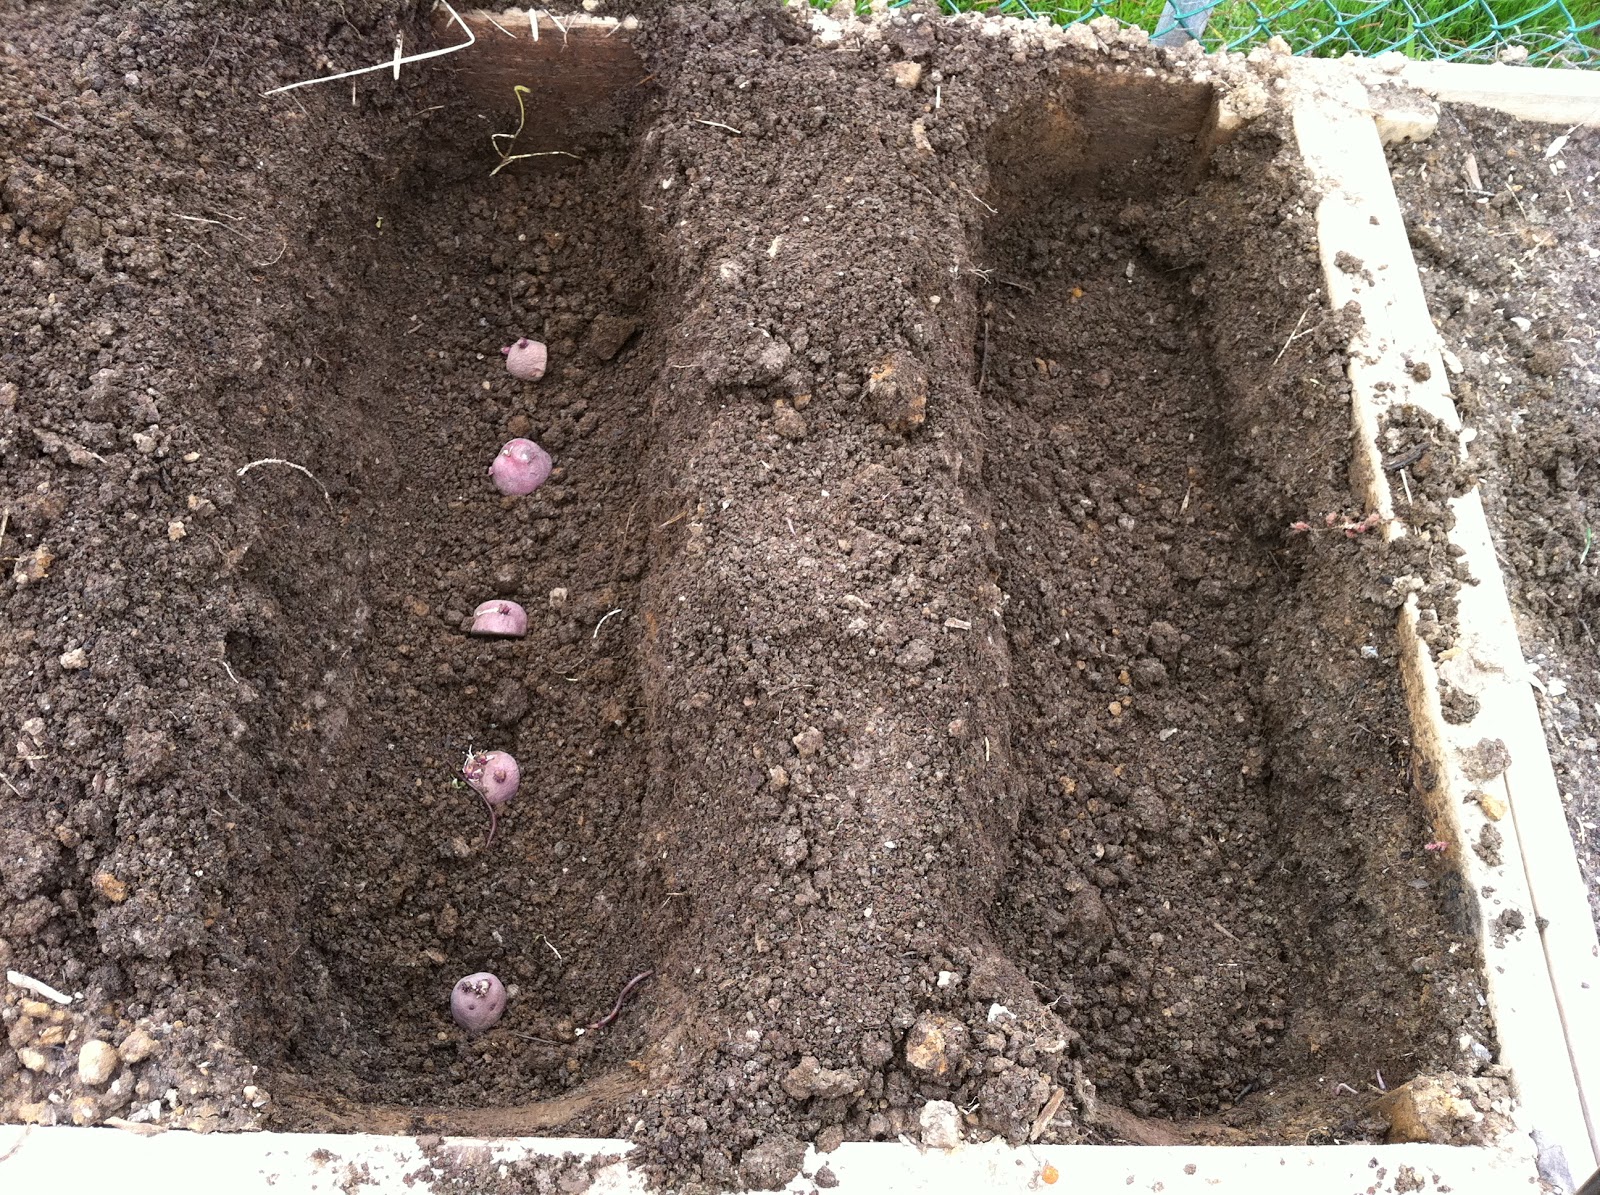
What I have done the past weeks is get a good 3" covering on my raised beds.  I have about 200 sq ft of raised beds.  I called our township borough to make sure it was ok to get some wood chippings from their compost facility.  They were happy to ablige.    So over the past weeks, Mike and I have filled garbage bags with wood chippings and leaves and brought them to my garden.  The picture in this blogs illustrates what this looks like.  I also have my compost bin constantly at work.  One thing that my compost bin lacks is browns (the nitrogen) as we have no trees on our property or on our street for that matter.  When Mike and I were pitching leaves from the compost facility into garbage bags in the dead of winter, I was amazing to see a warm steam coming from the composting leaves.  The leaves were even hot to the touch!  How cool is that?!  God at work even in the coldest of days.

Birds eye view of my garden

tree chippings

more tree chippings, garlic is under there waiting for the warm weather!


There is never a wrong time to get your garden started with a good covering.  I will be blogging about my experience of my Back to Eden garden this season.

This weekend I started some early seeds.  Onions, (yellow and scallions), broccoli, broccoli rabe, celery and parsley.

Onions, broccoli, broccoli raab, celery, parsley started


Next weekend peppers and radicchio will be started.  My goal this year is to see if I can grow, all that I enjoy eating.  Years past I've focused on large quantities of the easy stuff.  This season it will be more of manageable portions of we eat on a regular basis.  Some newer endevours for me are radicchio, kale, brussel sprouts, chinese cabbage, dried beans, parsnips and winter squashes.  Biting off more than I can chew?  Perhaps, but with all failures, come growth and learning.

Monday, October 24, 2011

Sweet Puh-Puh-Potatoes?

It's been a while since my last post and shame on me for not sharing in this summers successes and failures as they happened.  Tomato's were a flop this summer.  I blame it on the rain.  I usually yield about 30 jars of tomato sauce from the season.  This year I ended up with a measly 12 jars.

But I'm not here to talk about tomatoes. I'm here to talk about sweet potatoes.  Yesterday we got around to harvesting our first try at sweet potatoes.  I read that the longer you keep them in the ground, the sweeter they get.  I also read that you can keep them in the ground until one or two frosts.  When you see the leaves starting to yellow, that's a sign to harvest them.  When the leaves start to blacken (from frost), then you really need to pull them. 

Anyway, it was a nice sunny Sunday, so we had at it.  If you can see in the picture, some of the leaves are starting to turn black.

As you can see from the next picture, the vines really spread out from their original spot.  When I planted them I had 3 rows of about 5 sprouts. 

First we started by using a spade shovel and trying to scoop under where we thought they would be.  We then had our first glimpse of sweet gold.


After pulling up a few, we realized that it was easier to pull away all the leaves and vines and we could get at them with less wrestling of the foliage.  The leaves were a nice addition to my compost bin. Pulling out the potatoes, almost reminded me of harvesting carrots. They just popped right out.


Heck, some of them even looked like carrots.

After harvesting them, I laid them out in the sun to start the curing process. 

After a couple hours, I put them in brown bags and now have them in the warmest room in our house (our bedroom gets the most sun and is nice and warm during the day).  They should stay in a warm ventilated room (ideally between 85 and 90 degrees Fahrenheit, but our bedroom will have to do) for 8 to 10 days.  Although, you can cook and eat sweet potatoes right out of the ground, curing is recommend to both heal any injuries incurred from harvesting, and to enhance their natural sweetness.  After curing, I will store them in a cool, dry place (basement) in brown bags. 

I am looking forward to preparing them and eating them.  I'm not sure if I will plant sweet potatoes again next season.  They took up a good deal of space in my beds, and I was expecting (hoping) for a larger yield.  I harvested about 20lbs of sweet potatoes.

The red potatoes that I planted this season, gave me a larger yield and less time in the ground.  So they will definitely be in my garden plan next season.

I'll let you know how they taste!

Saturday, July 9, 2011

Potato Success!

What a surprise for me tonight when I dug up a potato after I had assumed my potato adventure this summer was a failure.

After battling Colorado Potato Beetle's back in April by picking them off and removing any leaves with eggs, I thought that I was doing pretty well.  The plants were flourishing.  Green, bushy and quite healthy looking.  However, not knowing very much about what to look for with potato plants, I started to notice the leaves getting spots all over them.  This was in June:

I thought perhaps that I had some sort of deficiency in the soil for the leaves to start looking that way.  Anyway, as time went on, the leaves started to look worse and die off.  What at one time looked like a flourishing crop of healthy potato plants, started to dwindle down to a sickly looking patch.  Discouraged, I gave up hope and wrote off my potato trial as a flop.

Then the other day I decided to research what exactly are the signs to know when it's time to harvest potatoes.  What I found out is that the plants die off and when they all die, then it's time to harvest them.  I figured it couldn't hurt to just check it out to see.  After all, I was going to have to clean up the potato failure anyway.  So tonight, after picking some parsley for our rabbits, I took out a hoe and gently started to dig down into the earth.  After going down about 6 or so inches, I hit something red.  Could it be?  Digging a bit more, sure enough, there in the soil was a red potato.  And not just a wimpy little rotten potato, but a big, bright red healthy potato!  Excited I ran in the house to tell Mike of my discovery.  All through dinner I thought about the treasure waiting outside for me.  How many potatoes where there??

After dinner, we went out with some bags and started digging.  Being ever so careful not to cut into any potatoes.


Mike and I had a ball uncovering the "fine fluffy white potatoes" (must be said in an Irish accent).


And after about 1/2 hour we had about 25 lbs of red gold.  We know what we are having for breakfast tomorrow!

So what I thought was a failure, turned out to be a great success.  I hope that my sweet potatoes do as well as my red potatoes did.  I'll keep you posted!

Sunday, April 10, 2011

New Adventures in Pototoes

This is my first time growing potatoes.  Hopefully it will be a rewarding first-time experience.  I decided on red-potatoes and sweet potatoes.  In our area, red potatoes are ready to start now.  The sweet potatoes, I have read, are a bit of a warmer season veggie so I should wait until June to start those.  That said, I have begun the red potato process and thought I would share with you my experience thus far.

I ordered a 2lb bag of Red Norland Potatoes from Henry Fields Nursery.  I am not plugging them by any means, but I have had good success with them so far with everything I have purchased from them.  I have purchased asparagus roots and blueberry plants and both came to me in great condition and both have been  successful in their growth for me. I selected Red Norland potatoes as I read that they produce compact plants which are good for smaller gardens, which is what I have.  I have also read not to use grocery store potatoes for growing as they are treated with a growth retardant. Also it is good to use certified seed potatoes that are meant for producing eyes on potatoes

When I got the bag there were about a dozen small potatoes in the bag with eyes started on each of them.  You are not supposed to place the entire potato in the ground with more than 2-3 eyes on a piece potato.  What you do is cut the potato so each cutting has about 2-3 eyes per cut.  Each eye will produce a plant.

After I cut the potatoes, I placed them back in the bag to for a few days to heal and form a scab over the cut area.   After that they are ready to be planted.


Today, I was finally able to get them in the ground.  We have had so much rain this week that I was unable to plant them sooner.

To plant potatoes, you first need to dig a trench about 8" - 12" deep.  You then place your potatoes with the eyes facing up about 10" apart"


You then cover your potatoes with about 2-3" of dirt (you don't back fill in the trench completely)

I ended up with 4 rows of about 5 potatoes per row.


(I am saving the other half of the bed for some sweet potatoes.)  As the potatoes start to grow.  You are supposed to do something called "hilling".  Which is after the plants are 8-10" tall, use a hoe and pile several inches of soil up around the stems. The prevents exposure to the sun which causes tubers to become green and inedible.

Hopefully, they will do well.  I am so excited to see what happens next!

The Blueberry Experiment

I am determined to salvage that blueberry branch that broke off from the plant that I ordered.  So here the following is what I ended up doing.  Hopefully it will not be in vain.

For those that don't remember from my past post, I had planted a bluecrop highbush about a month back only to find it battle damaged from small boys playing in the backyard:


What I ended up doing to the broken branch was take it inside and put it in a cup of water and put it in a window sill.  I have been surprised with how the buds have continued to grow and new buds have since formed.


So what I ended up doing is potting the cutting in peat moss.  I soaked the peat moss in water and then placed the moss in a pot.  I then put the branch in the peat moss and  covered the pot in a plastic wrap to create a sort of humid effect to help keep a warm moisture to aid in root generation.


I currently have the cutting in my window in my office and so far I am surprised with how much new growth it is producing.  Hopefully though by placing it in the peat moss it will give me some root so I can get it back out in the ground outside.  I will keep you informed of the progress or lack thereof.  Wish me luck.

Sunday, April 3, 2011

Busy weekend

Oh my!  What a weekend I had.  We were supposed to have gone to Washington DC this weekend as I was registered to run in the Cherry Blossom 10-miler, but we have been going non-stop and decided to stay put this weekend.  That gave me that chance to work on the garden some.  As a result I got quite a bit done.

On Saturday I worked on weeding and tilling up some of the beds a bit.  Hard work for sure.  I had put down compost from my compost bin in the fall, and so the soil is very rich and ready to go for the summer.  I will add compost throughout the year as needed by just laying some on top and turning it in a bit.  Anyway, I was able to weed around the garlic that is growing nicely as well as the chive and oregano.  Also I cut back the dead from my asparagus and weeded around it.  All in all quite pleased with how the beds cleaned up.


Here is the garlic that I planted in the fall:

While I was tilling up the beds, I decided to remove the strawberries that I had planted last year.  I realized that for my garden, planting strawberries was a bad idea.  I just don't have the room to support them.  Perhaps when we have more land I will have a separate area just for strawberries.  So for now I dug them up and decided to pot them, hoping that they will produce a few strawberries this summer in the pot.


And finally, for the end of Saturday, I planted a first phase of lettuce, some spinach, arugula, swiss chard and some cilantro.


All-in-all a productive first day.

For Sunday, (today) I first worked on getting my peppers into larger pots as they were just sitting in peat pellets.


After that I Matt and I worked on planting some flower seeds.  So now they are busy "incubating" So they will be ready to go for the summer. 


Matt counted them and we planted 80 flower seeds in all!  The above picture is my indoor set up.  This is our bedroom.  Our bedroom gets the best/most sun so this is where I start all my seedlings.  Mike made that little enclosed plexiglass box for me to help create a mini greenhouse for me to aid in germination. 

I also finished tilling up the rest of my beds. This bed I will be planting potatoes.  Which I will be putting red potatoes in the ground this week.


And finally, planted sugar snap peas, peas, snow peas, green beans, soy beans, parsley and transplanted the broccoli I started.


In hindsight, I am concerned that I should have held off on planting the broccoli outside, but if it doesn't take, I'll just start again with a direct sow in the ground.

Anyway, busy weekend indeed.  I am quite sore from all that work.  Getting old is no fun, but it was great to be outside and working in the dirt again.